Creating a New Post in WordPress Using The Default Editor
In December 2018, WordPress introduced a new modern block-based editor also known as Gutenberg. It is clean and simple, but don’t let the looks deceive you.
Behind its clean interface, there are tons of powerful features neatly tucked away. We’ll explain all of them and help you unlock its true potential.
Adding Title and Content Blocks
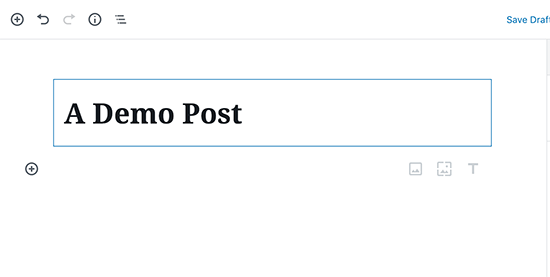
The WordPress block editor comes with a clean writing interface. At the top, you will enter your post’s title.
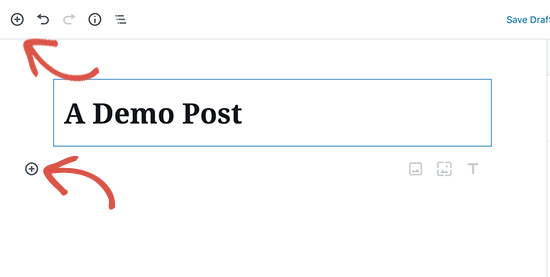
To add content, you need to add a block. There are multiple add block buttons on the screen that you can click to select and add a block.
If you don’t want to use a mouse to click on the button, then you can use a keyboard shortcut by typing / to search and add a block.
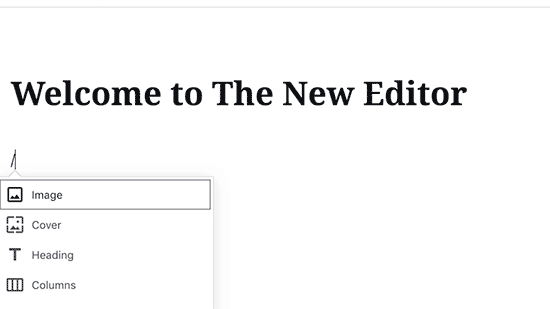
All content elements are wrapped in a block. WordPress comes with blocks for all the common content items including the paragraph, columns, images, gallery, embeds, shortcodes, widgets, and more.
Some WordPress plugins may also add their own blocks to add other features like contact forms, SEO, etc (more on this later in the article).
Adding Images, Videos, & Other Media
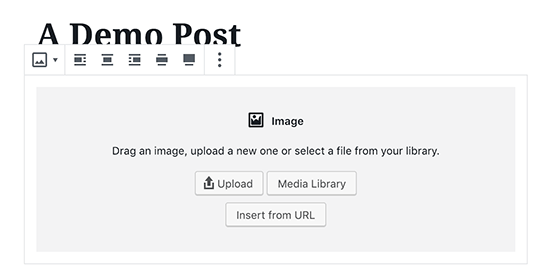
You can add images by simply adding the image block and then upload or select the image you want to add.
If you want to text and image next to each other, then you can use the ‘Media & Text’ block. This block helps you wrap text around the image in WordPress.

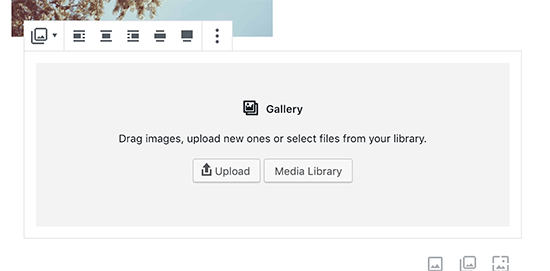
WordPress editor also comes with a Gallery block that you can use to display images in rows and columns with a grid layout.
Simply add the Gallery block and then upload or select the images from your WordPress media library.
While the gallery block is powerful, you may need other advanced gallery features like albums, image sorting, etc. In that case, we recommend using one of these WordPress gallery plugins.
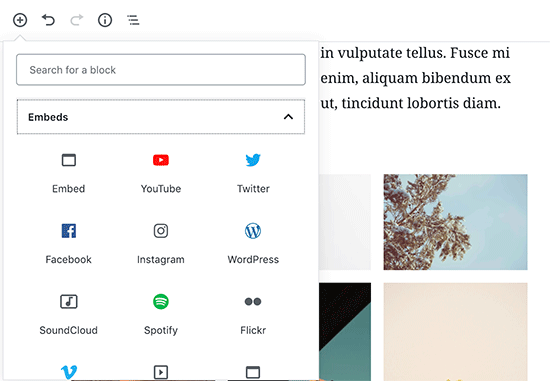
Embeds
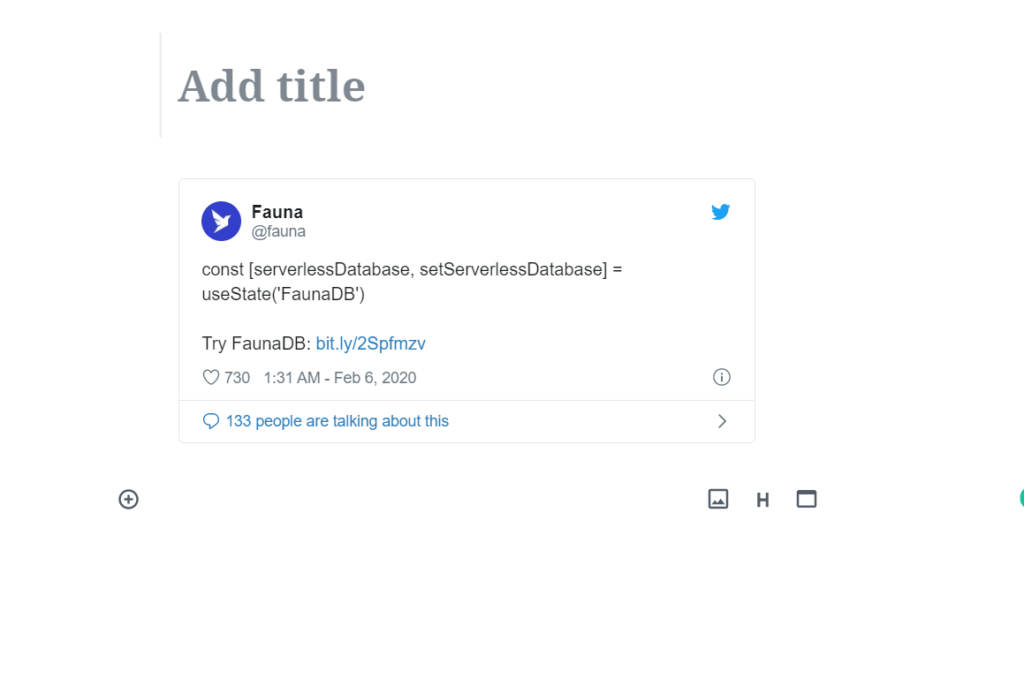
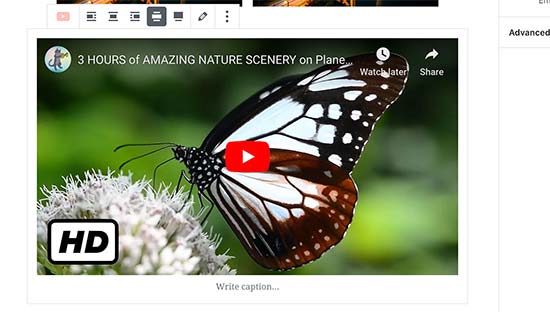
Want to embed a Twitter in your content just copy any status URL from Twitter and paste it here it will automatically embed the tweet in the article or you can select to embed from Embed section.
The default WordPress editor comes with embed blocks for all popular providers.
You can also just copy and paste the video URL to a paragraph block, and WordPress will automatically convert it into a video embed block.
While you use the video block to upload videos directly to your website, we recommend against that because it will slow down your website and can even crash your WordPress hosting server.
Instead, we recommend uploading your videos on a service like YouTube or Vimeo, and then embed it in your WordPress posts.
For more details, see our guide on why you should never upload videos to your WordPress site.
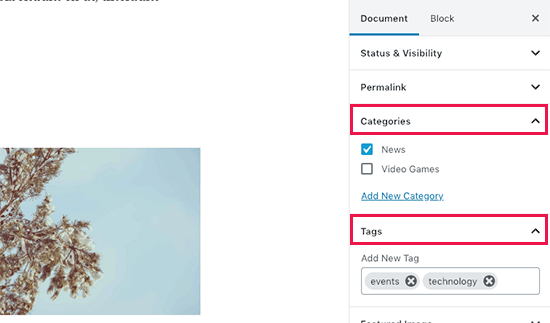
Adding Categories and Tags
WordPress allows you to sort your posts into categories and tags. These taxonomies help you organize your content into sections and topics.
They also help with SEO and make it easier for your users to find the content they are looking for.
The categories and tags meta boxes are located in the right-hand column, under the Document settings.
Adding Featured Image
A featured image (also known as post thumbnail) is the main article image that represents the content. They’re prominently displayed on your website on single posts, blog archive pages, as well as on the homepage of news, magazine, and blog websites.
Almost all WordPress themes support the featured image functionality. You will find the option to add a featured image to your post in the right column under the Document settings.
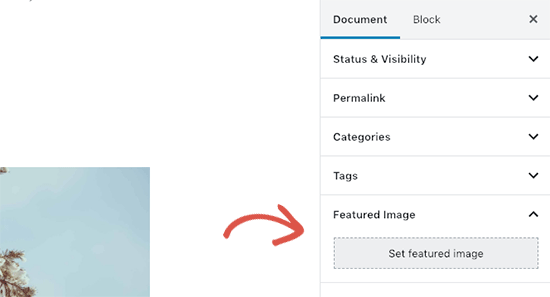
Simply click on the ‘Set featured image’ button and then select or upload the image you want to be used as the featured image.
It’s important that you don’t confuse featured images with cover images which is a new feature. See our article on cover image vs featured image for more details.
Adding Excerpts (Article Summary)
Excerpts are the summary of a blog post or article. Most WordPress themes can automatically generate the excerpt from the first few lines of your post.
However, this automatic excerpt may not always be meaningful or catchy. In that case, you may want to manually add an excerpt.
You can do so by adding it in the excerpt box located under the document settings column on the right.

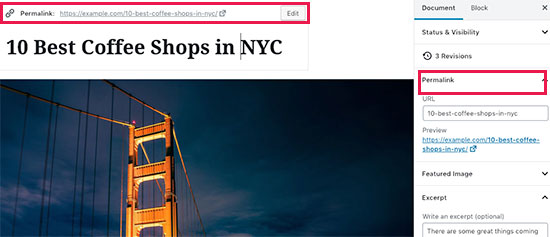
Changing Post URL Slug or Permalink
By default, WordPress uses SEO friendly URLs for your blog posts. It automatically uses your post’s title as the permalink.
However, some users may want to change it to be more SEO and user-friendly. There are two ways to do that.
You can click on the post title, and you’ll notice the option to change the permalink above the title field. Alternatively, you can change it from the Permalink tab under the document settings column.
Turn Comments On / Off
WordPress comes with a built-in commenting system that allows users to leave comments on your post. You can turn off comments for individual posts from the Discussion tab under the Document tab.
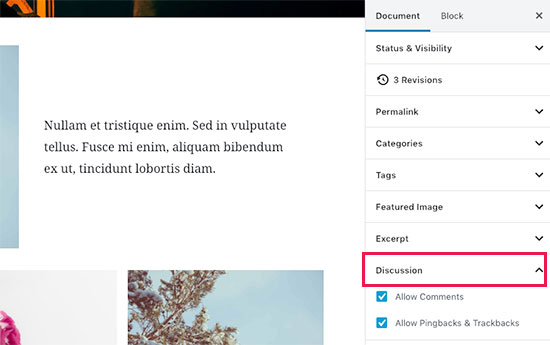
You’ll also see the option to allow pingbacks and trackbacks. These allow you and other blogs to notify each other when they link to an article.
However, it is mostly used for spam, so we recommend completely disabling pingbacks and trackbacks.
Please refer to comment article to know more about managing the comments
Publishing Options
The default WordPress edit screen is divided into two columns. The left column is where you write content, and the right column has all post settings including publishing options.
Let’s take a look at publishing options in the right column.
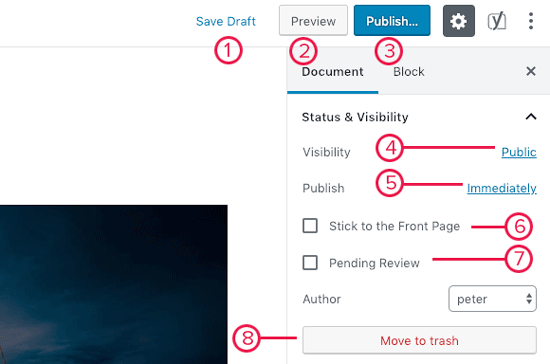
1. Save draft link allows you to quickly save changes you made to a WordPress post. The editor will also automatically save your changes as you write.
2. The preview button will open a live preview of your post or page in a new browser tab.
3. Once you are done editing your post, you can click on the Publish button to make your post go live.
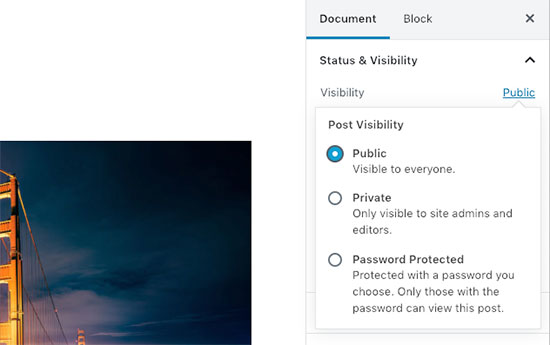
4. WordPress gives you a few options to control the visibility of your post. The default option is ‘Public’ but clicking on it will show you options to make a post private or password protected.
5. WordPress also allows you to control when a post is published. The default option is to publish immediately, but you can also schedule your posts to publish later or even select a past date.
6. Checking the box next to the ‘Stick to front page’ will make a post sticky or featured. This makes the specific post appear on top of other posts. Learn more about sticky posts and what you can do with them.
7. Pending review option will add a custom status next to your post as a ‘Pending review’. This feature is particularly helpful in multi-author blogs where contributors can just save posts and not publish them.
8. If you want to delete a post, then you can click on the ‘Move to trash’ button. WordPress will send the post to trash. Deleted posts will remain in the trash folder for up to 30 days. After that, they will be deleted permanently.
Edit Screen Options
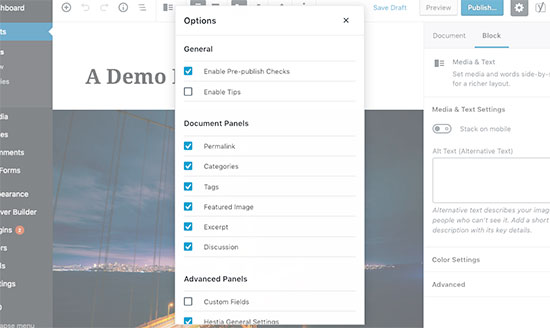
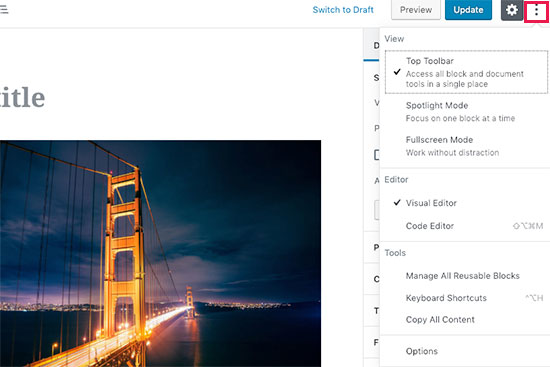
WordPress allows you to show and hide panels from the edit screen. You can do so by clicking on the three-dot menu at the top-right corner of the screen and then clicking on the ‘Options’ button.

This will bring up a popup where you can check or uncheck the panels.
Other Post Edit Screen Options
There are many other options on the post edit screen. Most of them are related to the appearance of the post edit screen and the editor itself.
Let’s explore them.
When you click on the three-dot menu icon at the top right corner of the screen, you will see options to move block toolbar to the top, spotlight mode, fullscreen mode, switch between visual editor or code editor, manage reusable blocks, and keyboard shortcuts.
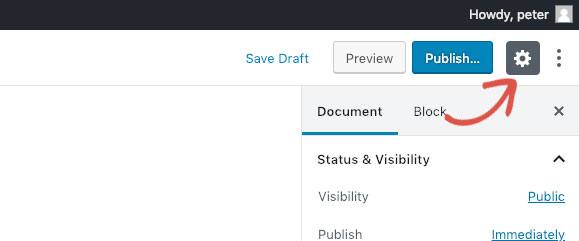
Next to it, you will see a button with the gear icon. Clicking on it will show/hide the right document and block settings column.
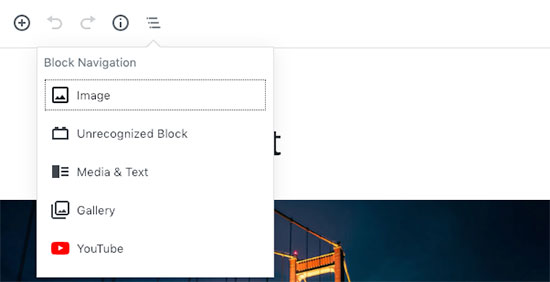
On the top-left corner of the screen, there are a few more buttons. First, from the right, you will see the block navigation button which allows you to quickly jump to a block in your post.
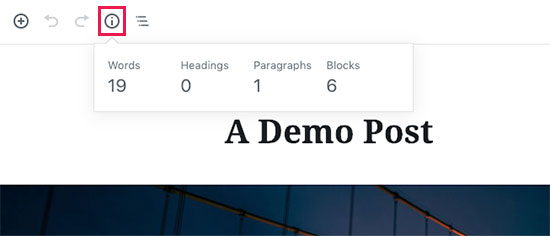
Next, you will see the information icon. Clicking on it will show you post stats like the number of words, paragraphs, headings, and blocks.
After that, you have Undo and Redo buttons which allow you to undo changes you made to your posts before saving or publishing them.
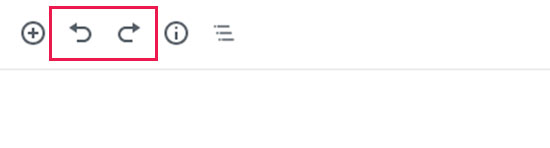
Finally, you have the add block button which allows you to insert blocks to the post editor.
The default WordPress editor is quite powerful.
We encourage you to explore it on your own when writing blog posts and pay attention to the individual block settings. Each block has different settings, and you’ll discover a lot of neat tricks there.
Screen Options
Some of the options on the post edit screen are hidden by default to present a cleaner and simpler editing experience. These options are not commonly used by beginners. However, you may need them later.
Simply click on the Screen Options button on the top right corner of the page. This will show a menu with checkboxes next to option names.
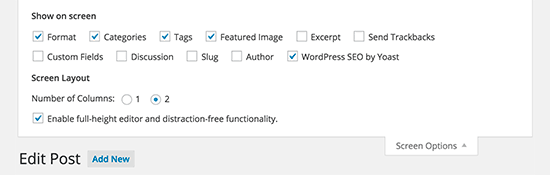
As you can see some of the options will already be checked. For the others, you can display them by clicking on the checkbox next to an option name, and it will appear on your post edit page.
Let’s take a look at some of these options and what they do.
Excerpts
Checking this box adds a meta box below your content editor. You can use this box to add a short summary or excerpt for your post.
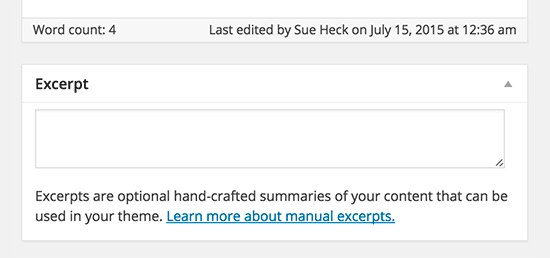
Ideally, you should display a summary or excerpt for your posts on your site’s front-page and archives. Full content should only be displayed on the post’s single page. Learn more about this in our guide full post vs summary (excerpt) in your WordPress archive pages.
Discussion
While comments are a great way to engage your audience, sometimes you may not want to have comments on a specific post or a page.
The discussion option displays a meta box below post editor to turn on/off comments and pingbacks for your post.

Since pages are supposed to be like static pages, most users want to turn off comments on them. You can do so by editing each page, or you can see this tutorial to turn off/disable comments on WordPress pages.
Once your WordPress site gets some reputation, you will start getting an increase of comment spam. Instead of turning off comments, you may want to try these tips and tools to combat comment spam in WordPress.
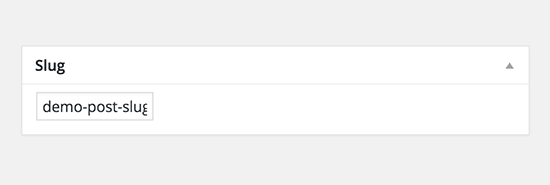
Slug
A slug is a cleaner title that can be used in URLs.
WordPress automatically generates a post slug and displays it as the post URL just below the post title. You can edit the URL slug by clicking on the edit link below the post title.
You can also enable the slug option from the Screen Options and edit your post slug there.
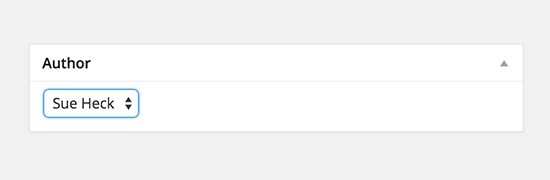
Author
WordPress will automatically assign you as the post author when you create a post. However, sometimes you may want to show another user on your WordPress site as the author. Enabling the author checkbox allows you to do that from the post edit screen.
Note: Multiple authors will be enabled soon and this article will be updated
Options Added by WordPress Plugins
So far we have only explained the default WordPress post edit settings. Many WordPress plugins will also add their own settings panels on the post edit screen.
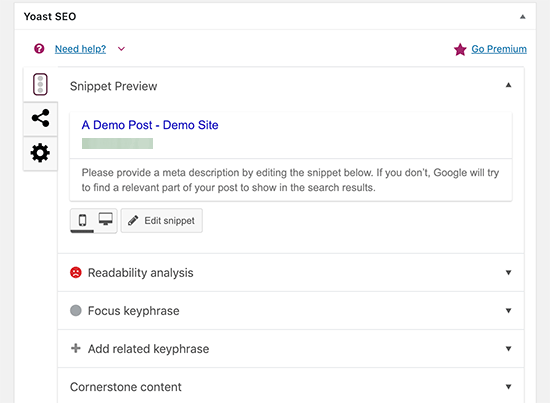
For example, Yoast WordPress SEO plugin adds its own settings panel.